Global Switches
Global Switches Overview
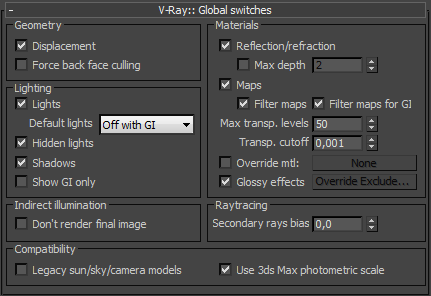
The global switches allow you to control various aspects of the renderer globally.
Geometry Parameters

Displacement - enables (default) or disables V-Ray's own displacement mapping. Note that this has no effect on standard Max displacement mapping, which can be controlled via the corresponding parameter in the Render Scene dialogue.
Force back face culling - enables or disables (default) back face culling for camera and shadow rays. When this option is on, the surfaces of objects which are turned away from the camera (or the light source, when tracing shadows) will appear fully transparent. This allows the user to look inside closed objects when the camera is outside.
Lighting Parameters
Lights - enables or disables lights globally. Note that if you uncheck this, V-Ray will use the default lights. If you do not want any direct lighting in your scene, you must uncheck both this and the Default lights parameters.
Default lights - allows you to control the default lights in the scene.
-
Off - the default lights in the scene will be always switched off
-
On - the default lights are always switched on when there are no lights in the scene or when you have disabled lighting globally (see Light parameter).
-
Off with GI - the default lights will be switched off only when the Global Illumination is enabled or if there are lights in the scene.
Hidden lights - enables or disables the usage of hidden lights. When this is checked, lights are rendered regardless of whether they are hidden or not. When this option is off, any lights that are hidden for any reason (either explicitly or by type) will not be included in the rendering.
Shadows - enables or disables shadows globally.
Show GI only - when this option is on, direct lighting will not be included in the final rendering. Note that lights will still be considered for GI calculations; however, in the end, only the indirect lighting will be shown.
Materials
Reflection/refraction - enables or disables the calculation of reflections and refractions in V-Ray maps and materials.
Max depth - enables the user to limit globally the reflection/refraction depth. When this is unchecked, the depth is controlled locally by the materials/maps. When this option is checked, all materials and maps use the depth specified here.
Maps - enables or disables texture maps.
Filter maps - enables or disables texture map filtering. When enabled, the depth is controlled locally by the settings of the texture maps. When disabled, no filtering is performed.
Filter maps for GI - enable or disable texture filtering during GI calculations and glossy reflections/refractions. When off (the default), texture maps are not filtered for GI and glossy reflections/refractions in order to speed up the calculations. If this option is on, textures will be filtered in these cases.
Max. transp levels - this controls to what depth transparent objects will be traced.
Transp. cutoff - this controls when tracing of transparent objects will be stopped. If the accumulated transparency of a ray is below this threshold, no further tracing will be performed.
Override mtl - this option allows the user to override the scene materials when rendering. All objects will be rendered with the chosen material, if one is selected, or with their default wireframe materials if no material is specified.
Override exclude - clicking this button brings up the 3ds Max Include/Exclude dialogue which allows you to select exactly for which objects the material is overridden.
Glossy effects - this option allows the user to replace all glossy reflections in the scene with non-glossy ones; useful for test renderings.
Indirect Illumination
Don't render final image - when this option is on, V-Ray will only calculate the relevant global illumination maps (photon maps, light maps, irradiance maps). This is a useful option if you are calculating maps for a fly-through animation.
Raytracing
Secondary rays bias - a small positive offset that will be applied to all secondary rays; this can be used if you have overlapping faces in the scene to avoid the black splotches that may appear. See the Examples section for a demonstration of the effect of this parameter. This parameter is also useful when using the 3ds Max Render-to-texture feature.
Example: Secondary Rays Bias
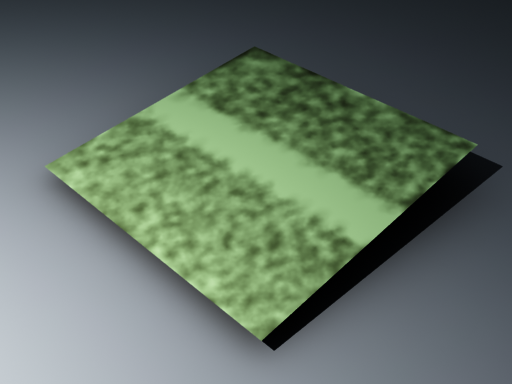
This example shows the effect of the Secondary rays bias parameter. The scene below has a box object with a height of 0.0, which makes the two sides of the box to occupy exactly the same region in space. Due to this, V-Ray cannot resolve unambiguously intersections of rays with these surfaces. The first image shows what happens when you try to render the scene with the default settings. You can see the splotches in the GI solution, caused by the fact that rays randomly intersect one or the other surface:

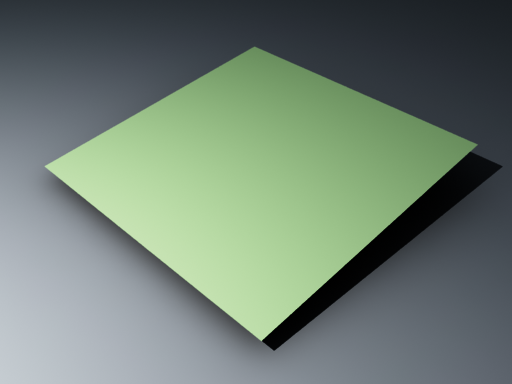
In the second image below, the Secondary rays bias is set to 0.001, which offsets the start of each ray a little bit along its direction. In effect, this makes V-Ray skip the problemmatic surface overlaps and render the scene correctly:

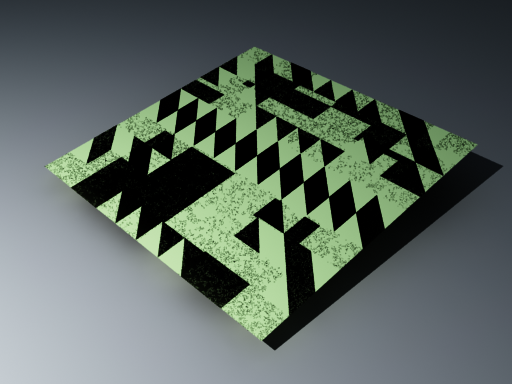
Note that the Secondary rays bias affects only things like GI, reflections, etc. In order to render the scene properly, the material assigned to the box has its 2-sided option checked. This is so that the object looks in the same way regardless of whether the camera rays hit the top or the bottom of the box. If the material did not have this option checked, it would appear "noisy" even though the Secondary rays bias is greater than 0.0:

Compatibility
Legacy sun/sky/camera models - previous versions of V-Ray used slightly different calculation models for the VRaySun, VRaySky and VRayPhysicalCamera which were not entirely physically accurate. When this option is off (the default), V-Ray uses improved and more accurate models. When this is on, V-Ray will switch to the old models for compatibility with old scenes. When an old scene is opened, V-Ray will automatically display a dialog asking if you want to change this setting.
Use 3ds Max photometric scale - when on (the default), this option aligns the VRayLight, VRaySun, VRaySky and VRayPhysicalCamera to the photometric units used by 3ds Max and its photometric lights. When this is off, these plugins operate in the internal V-Ray photometric space, like in older versions of V-Ray. Keeping this option on ensures that a VRayLight with a given power will match a 3ds Max photometric light with the same power.