Photon Mapping
What is Photon Mapping?
Photon mapping is a technique for computing global illumination. However, in difference from the irradiance map, which starts tracing rays from the camera, photon mapping traces rays from the lights in the scene. The two approaches are not mutually exclusive, and indeed for best results the photon map and the irradiance map should be used together.
The photon map has many parameters that allow for a lot of interesting results; here we will not discuss all possibilities, but will just point out settings that are reliable and work well in most cases.
Initial Settings
For all of our experiments, we will start with the following settings for the photon map (note that these may be different from the defaults):
-
Auto search distance - off
-
Max photons - zero
-
Store direct light - on
-
Retrace threshold - zero
The only parameters that we will actually use are:
-
Max density - this defines the resolution (spatial detail) of the photon map. Lighting information from the photon map is accumulated at a number of points on the surfaces of scene objects. This parameter defines the distance (in world units) between those points. Smaller values mean that the points will be closer to each other and there will be more of them. Larger values mean that the light samples will be farther away from each other and there will be fewer of them. Obviously, this parameter depends on the scale of your scene. Changing this parameter requires recomputing of the photon map, since it is used only while the photon map is computed.
-
Search distance - this defines how lighting will be reconstructed from the surface points described above. You may think of it as blurring of the photon map. It should be larger than Max density, but the exact value depends on how blurry you want your photon map solution to be. Values of 2-5 times the value of Max density work well. Changing this parameter does not require recomputation of the photon map since it is used only during rendering.
Additional parameters that we will keep at the default values, but which you may change as needed are:
-
Bounces - this controls the number of light bounces; you can set it to whatever value you want; more bounces mean slower computation of the photon map. We will keep this at 10, but you you may adjust it as you want.
-
Multiplier - this is a multiplier for the photon map; we will keep it at 1.0, but you may adjust it if you need.
We have thus limited the parameters of the photon map that we'll use to just two - Max density, and Search distance. These are enough for controlling the photon map. Besides those settings, the quality of the photon map depends on the number of photons emitted from scene lights. More emitted photons mean a smoother and more accurate photon map. The number of light photons is controllable for each light from the Light settings dialogue, accessible from V-Ray's System rollout.
A Simple Example - the Cornel Box
We'll demonstrate the effect of those two parameter on a simple Cornell box-like scene.
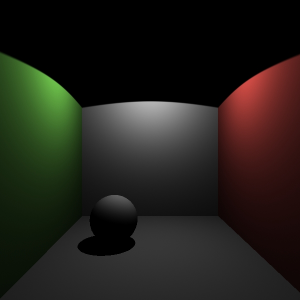
You can download the starting scene here (for 3ds Max 2010). It includes a very simple setup of a closed space with differently colored walls and a spot light. The walls have V-Ray materials applied to them since currently photon mapping works only with V-Ray materials.
Note that the spot light has inverse square falloff and quite a high multiplier. This is because real-world lights have inverse square falloff, and photon mapping produces inverse square falloff by default.
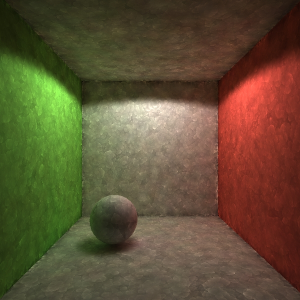
This is what you get if you render the file straight away.
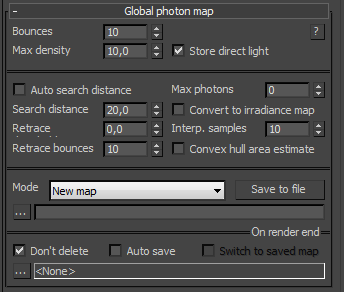
Now turn on GI and set the photon map method for both primary and secondary bounces. Turn off Auto search dist, set Max photons to 0, Retrace threshold to 0.0, and Max density to 10.0:
If you render, you should get this result:
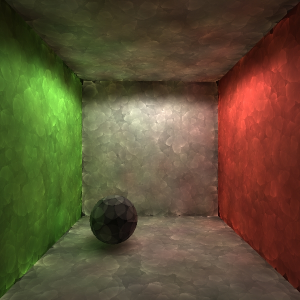
Now let's try to make the photons give us a little more detail. Change Max density to 5 and Search distance to 10. If you render again, you should get this:
This renders quite fast, and it is quite a good approximation to the lighting in the scene. Obviously, it is far from being a good-quality image, but we will get there eventually.
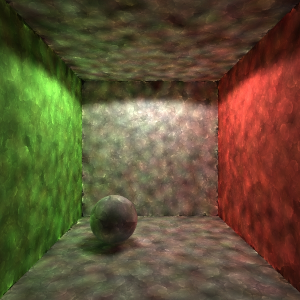
Now go to the Render dialogue, and in the V-Ray System rollout, click the Light settings button. In the dialogue that opens, select the spot light and set its Diffuse subdivs parameter to 500. This controls the number of diffuse photons emitted by the light (not directly though, the actual number of photons is the square of this number, in this case - 250,000). Close the Light settings dialogue and render again:
The photon tracing phase takes longer, but you can notice that the noise of the individual light samples is reduced, although the image is still splotchy. We can reduce the splotchiness by increasing the Search distance parameter. Set this to 40 and render again:
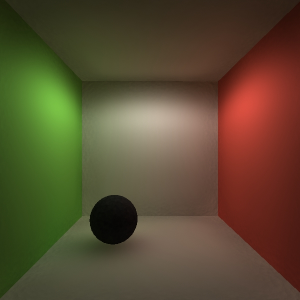
The sides of the box are smoother now, but the corners are still splotchy and the photons are still readable. Also the sphere became darker. We can't get perfect result just by using Photon map, so let's set the primary GI engine to Irradiance map in High preset (the default one). Irradiance map will use the built Photon map as base and so final image will be with smoother GI. Since we are doing the final render, switch the Image sampler to Adaptive to smooth the edges (the default setting will do the work) and render.

The Cornell box scene is a very easy scene for a global illumination algorithm, since there is very little occlusion (objects casting shadows and stopping the light). Next we will look at a more difficult example: the Sponza Atrium Scene.
A More Difficult Example: the Sponza Atrium
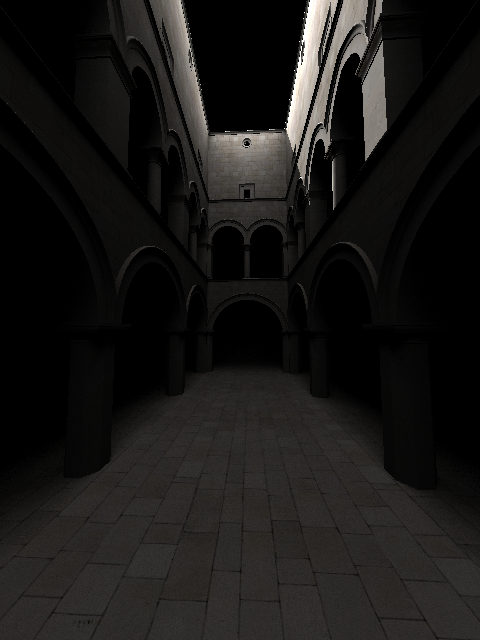
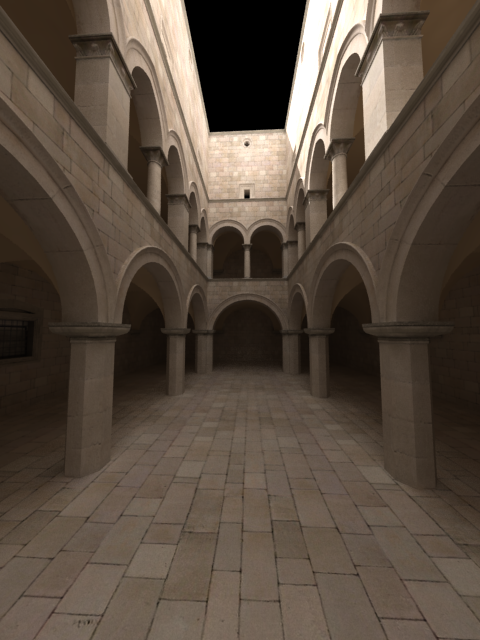
Now we will show how to use photon mapping on a more complex scene, the Sponza Atrium, which is modeled by Marko Dabrovic ( http://www.rna.hr ). You can download the initial scene here . If you render right away, the scene will look like this:
Note that photon mapping does not work with skylight. This is because photons need a real surface to be emitted from. Therefore, photon mapping is not suitable for outdoor scenes. However, in scenes where skylight comes in from small openings like windows, you can "invite" the light in by putting V-Ray lights at those openings. In the case of the Sponza scene, we have put a V-Ray light at the top of the building, which is the only place skylight comes from.
Now turn on Global illumination and choose the Photon map as both the firs t and secondary diffuse engines method. Next go to the Global photon map rollout and turn off Auto search distance, set Retrace threshold to 0.0 and set Max photons to 0:
Next, we must determine a good value for Max density . From that we will choose a value for Search distance.
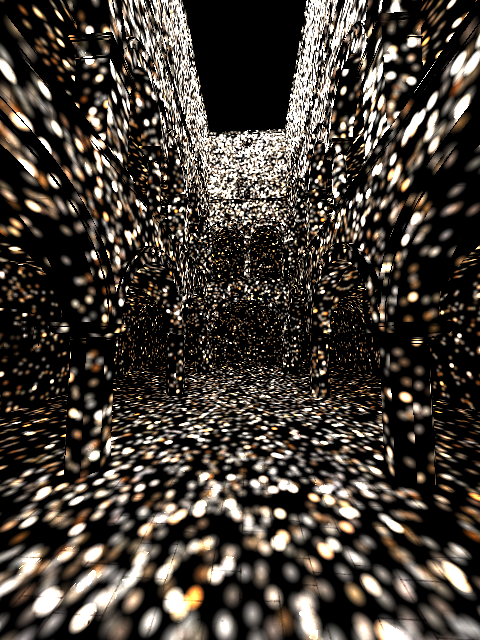
A good Max density value depends on the scene scale and the desired photon map detail. There is a Tape helper in the scene, measuring the distance between two columns. Its length is almost 6 units. So, a good value could be, let's say, one tenth of that distance. Set the Max density parameter to 0.6 and Search distance to twice that value, 1.2 and render. You should get a similar result:
The photons are producing too large splothces, so we'll obviously need lower values for Max density and Search distance. After some experimenting, we have found that 0.05 for Max density and 0.1 for Search distance produce the following result:
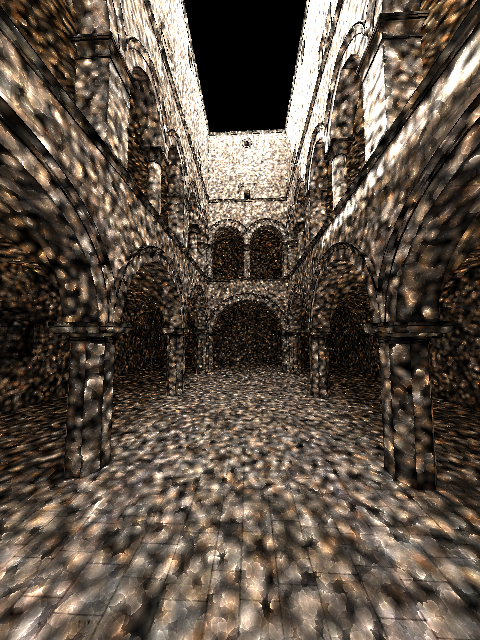
Very noisy obviously, but the detail (the size of the spots) seems to be good enough. We get dark areas and bright spots because we don't have enough photons emitted from the lights. To fix that, go to the System rollout and click on the Light settings button. Select both lights in the scene and set the Diffuse subdivs to 500 (which means 500 x 500 = 250,000 photons from each light). Close the Light settings dialogue and render. The photon tracing now takes longer, but the result is better:
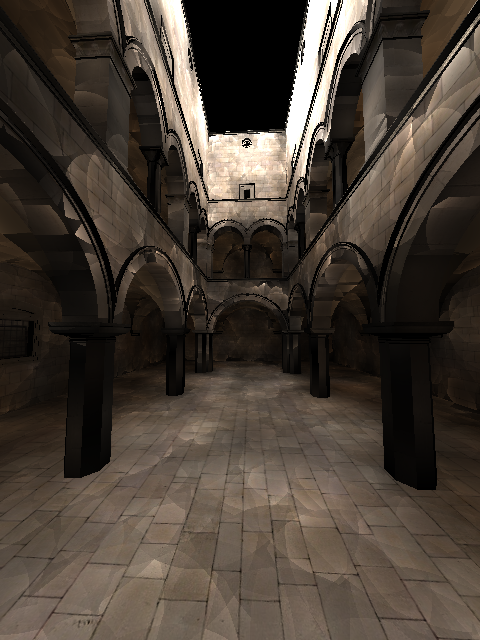
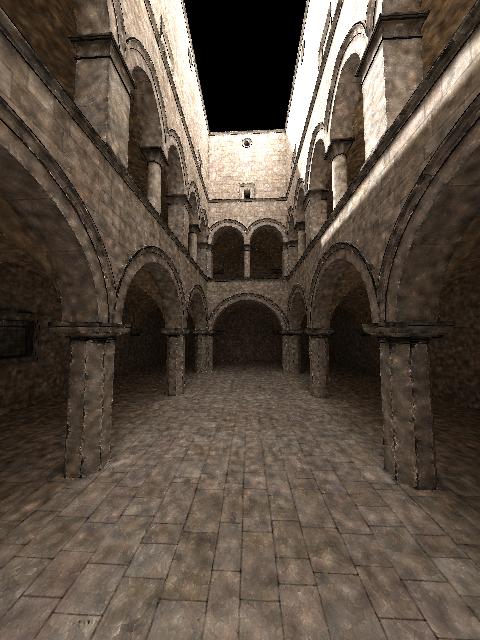
Still, we will need more photons for a good photon map, so set the Diffuse subdivs for the sun (the target direct light) to 2000 (which means 4,000,000 photons) and the the Diffuse subdivs for the V-Ray light to 2500 (which means 6,250,000 photons). Close the Light settings dialogue and render. The photon tracing phase now takes quite a bit of time (several minutes), but the result is a lot better:
In order to save time for subsequent renderings, you can save the photon map to disk: go to the Global photon map rollout and click the Save to file button. Choose any name for the photon map and save it. Then, set the photon map Mode to From file and using the Browse button select the map you just saved. We can now play a little with the Search distance parameter to blur the photon map a little more. Set the Search distance to 0.4 and render:
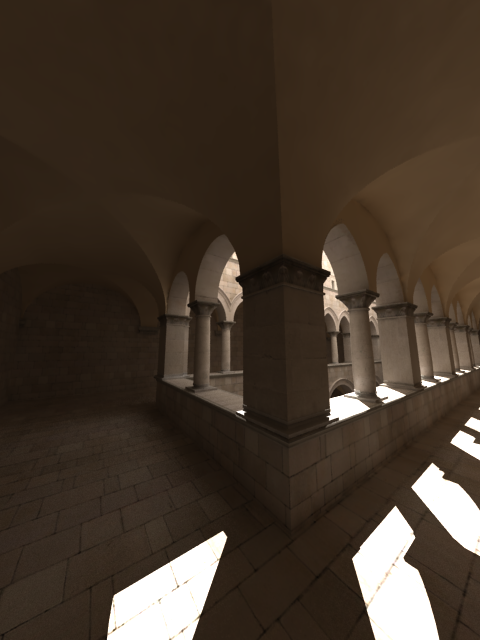
The photon map is smoother, but the effect of dark edges can be clearly seen. So, instead of using the photon map alone for GI, we will use the irradiance map to smooth the GI. Return the Search distance value to 0.1 and set the first GI engine to Irradiance map. Turn on the Show calc. phase option, choose the High irradiance map preset, change the Image Sampler to Adaptive and render:
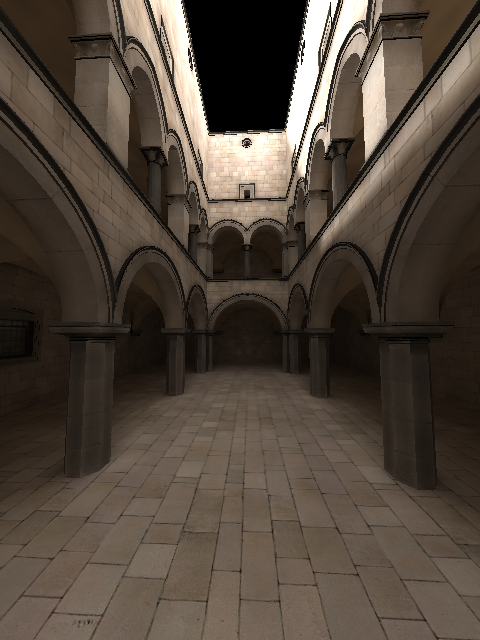
Note that the photon map is view-independent. We can render a different view without recalculating the photon map (the irradiance map still needs to be computed, though):
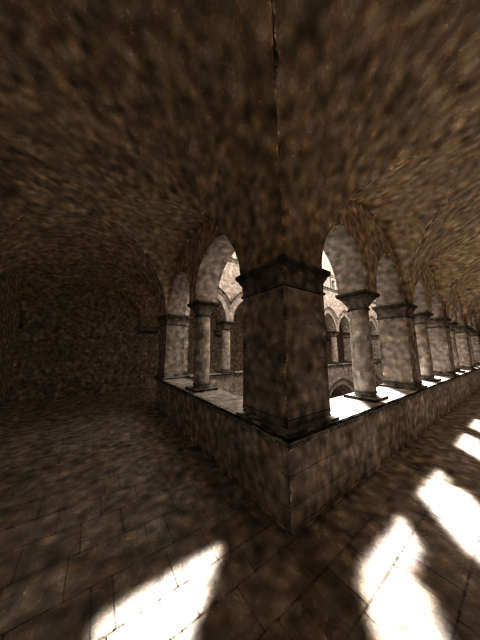
In this last image you can see some artifacts (splotches) in the corners where two surfaces meet. This happens because the photon map is too noisy in those areas, which is reflected in the irradiance map too. This is what the photon map looks like from this view:
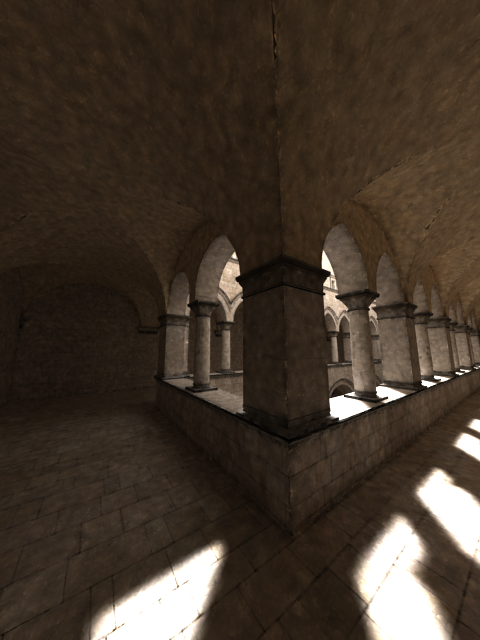
The noise is because light is more difficult to get into occluded areas of a scene. One way to reduce the noise in the photon map is to shoot yet more photons. Here is the photon map with 6000 subdivs (36,000,000 photons) for the sun and 5000 subdivs (25,000,000 photons) for the area light:
Here is the same image, but with irradiance map as the primary GI engine:

Of course, shooting more photons means (much) longer photon tracing phase. Another way to reduce the artifacts is to increase the Search distance value, which will blur the photon map a little more; however this will also make the dark edges effect more pronounced. This image was rendered with Search distance of 0.2; the original low-resolution photon map was used:
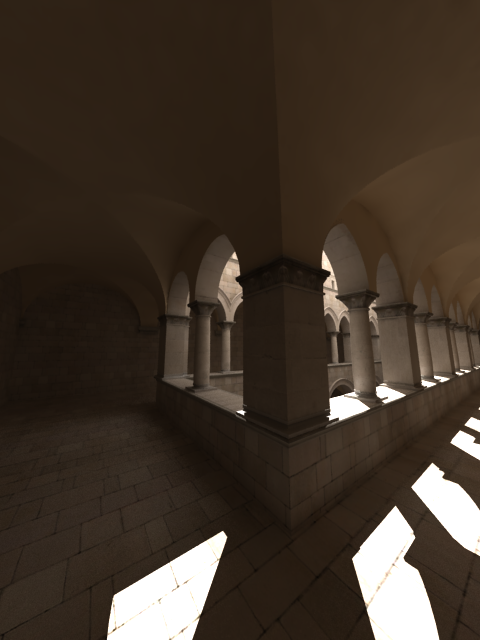
Since we have the larger map saved, let's try it with a Search distance of 0.4:
